Bootstrap Checkbox Toggle
Intro
In some instances the most basic things may possibly get extremely required-- specifically each time you come to need them. For example how do your visitors communicate with the webpages you set up stating a simple Boolean action-- simply just yes or no concerning some of the questions you require to request, exactly how they do confirm the conditions and terms or perhaps line up a handful of the attainable choices they might possess. We most likely get past this with no paying very much of an attention to the element accountable for these sorts of activities yet the Bootstrap Checkbox Button is really a very serious feature-- one our forms can not actually complete without.
Located in current fourth version of the Bootstrap system we are provided with the
.form-check.form-check-label<div>.form-check.form-check-label<label><input>.form-check-inputThe ways to use the Bootstrap checkbox:
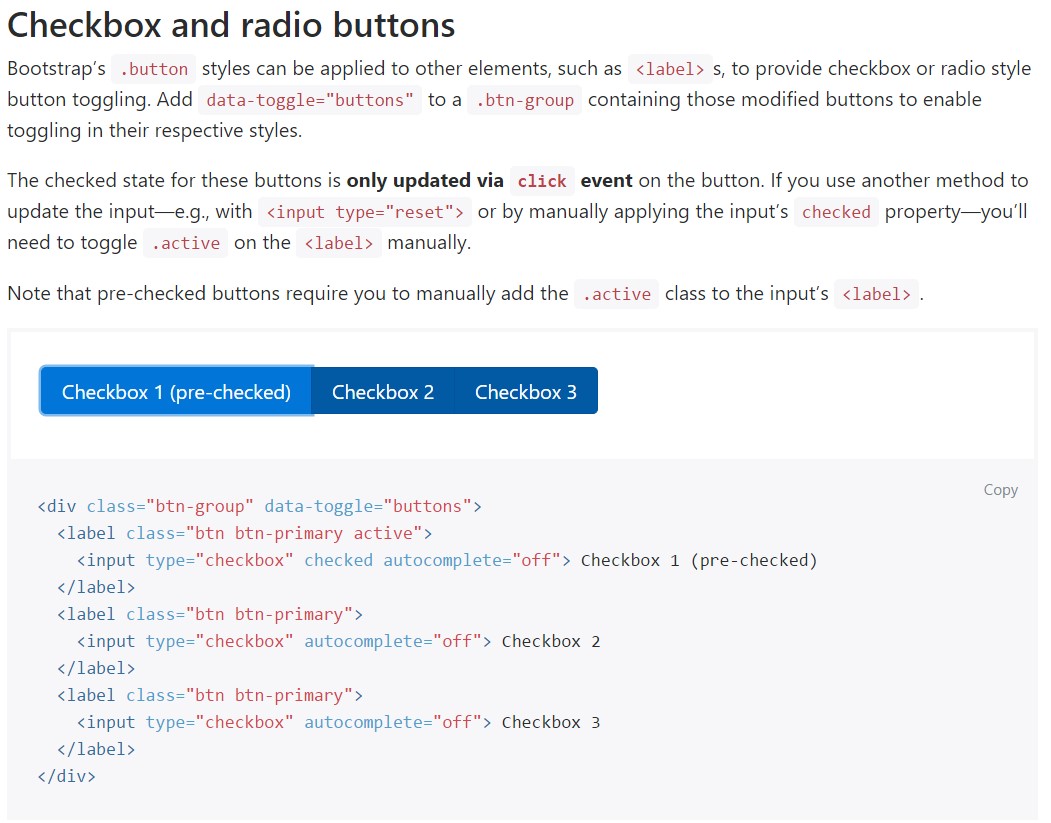
Bootstrap's
.button<label>data-toggle=" buttons".btn-group
<div class="btn-group" data-toggle="buttons">
  <label class="btn btn-primary active">
    <input type="checkbox" checked autocomplete="off"> Checkbox 1 (pre-checked)
  </label>
  <label class="btn btn-primary">
    <input type="checkbox" autocomplete="off"> Checkbox 2
  </label>
  <label class="btn btn-primary">
    <input type="checkbox" autocomplete="off"> Checkbox 3
  </label>
</div>
In some cases we really need the checkboxes to come within our forms without the customer truly being capable to bring any activity clicking them-- that is simply where the disabled option comes out.
If you want to disable correctly a checkbox in Bootstrap 4 working with the typical HTML attribute
disabledOn the occasion that you appreciate the idea and clearly wish to accomplish this you have to appoint the
.disabled.form-checkSome other example
Anytime you are utilizing checkboxes, wrap them in a
<label>.custom-control.custom-checkboxEmploy
.custom-control-input<input>Additionally put into action two
<span>.custom-control-indicator.custom-control-description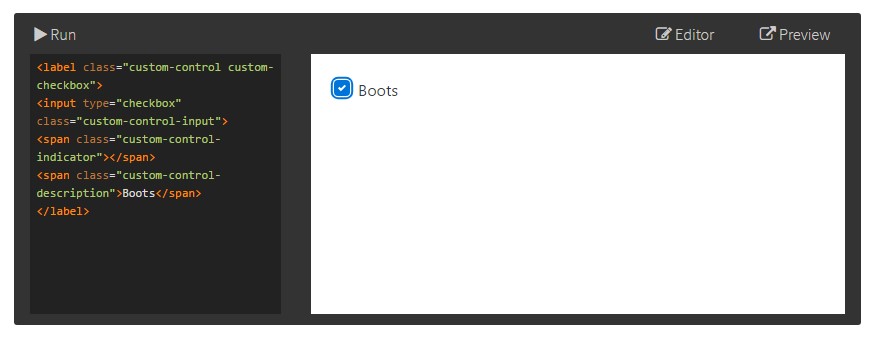
<label class="custom-control custom-checkbox">
<input type="checkbox" class="custom-control-input">
<span class="custom-control-indicator"></span>
<span class="custom-control-description">Boots</span>
</label>
Bootstrap Checkbox Class forms
Default checkboxes and radios are greatly enhanced upon with the aid of
.form-checkThe disabled class will at the same time lighten the text message colour to help specify the input's state.
A new thing for the Bootstrap version 4 system is the arrival of the so called customized form elements. These are actually the very same features we are known in capability but designated even more eye-catching and in the Bootstrap approach. Having them you have the ability to add in amazing excitement and individuality to your content with simply just selecting a number of special classes to the controls you incorporate in your forms.
In order to operate custom-made checkboxes wrap them within a
<label>.custom-control.custom-checkbox<input>.custom-control-input<span>.custom-control-indicator.custom-control-descriptionConclusions
That's essentially all you need to work on in order to set a checkbox component inside your Bootstrap 4 powered web site and incorporate some custom made flavor to it putting in it a fancy appeals. And now all you require to do is repeat the exercise till you've inspected all the checkboxes needed are already on the webpage.
Examine several video clip tutorials about Bootstrap checkbox
Linked topics:
Bootstrap checkbox approved information
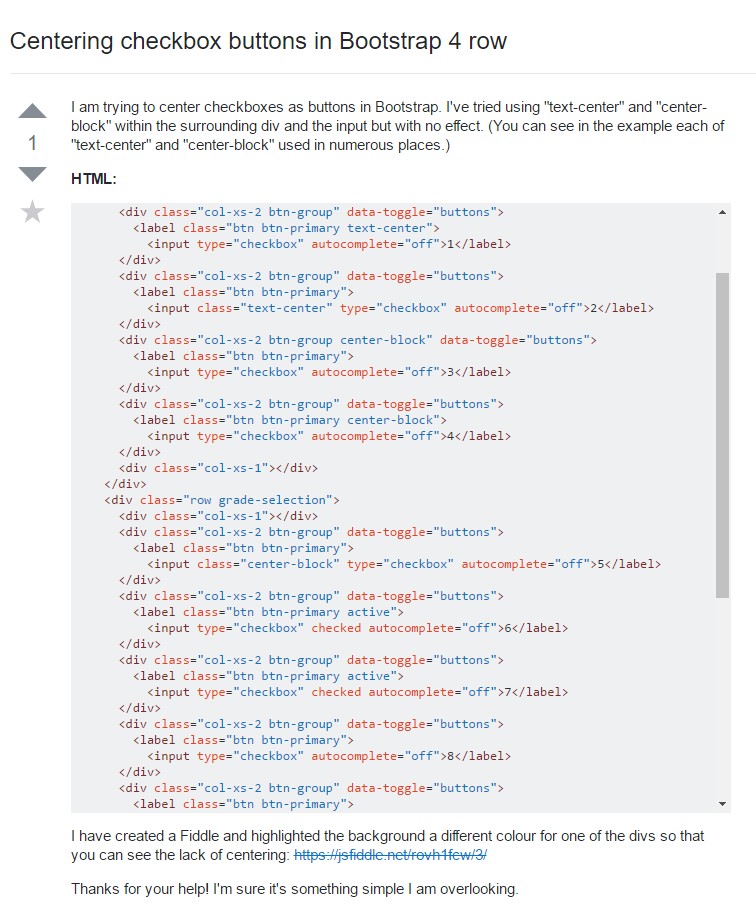
Centering checkbox buttons in Bootstrap 4 row
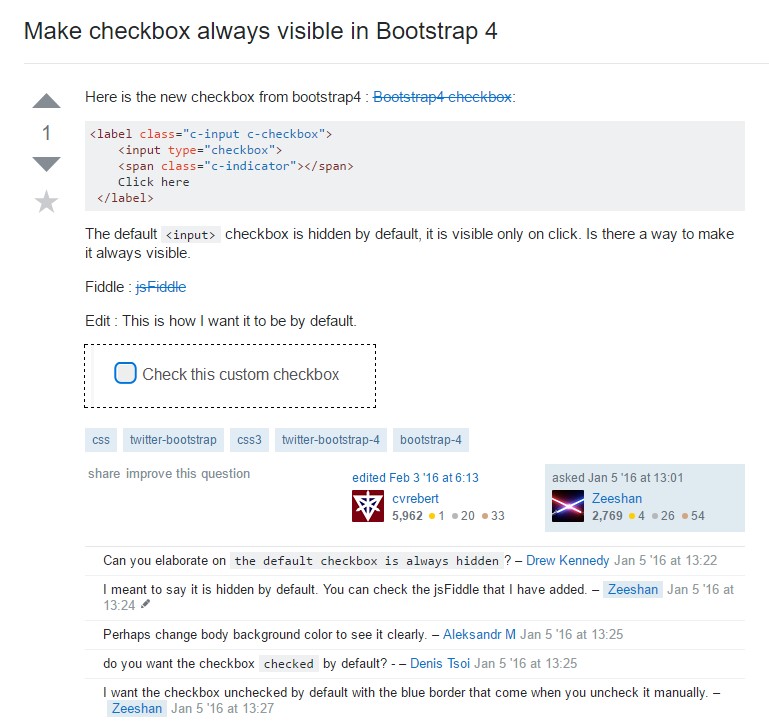
Make checkbox always visible in Bootstrap 4